


Alexa is Amazon’s popular cloud-based voice service built on Ivona, a Polish speech synthesizer that Amazon bought back in 2013. The skills are the functionalities you build into the Alexa device. With them, you can enable Alexa to perform some routine tasks for you, such as reading news headlines or telling you random jokes or even reading a story to your kid.
In this tutorial, I will walk you through building and deploying your own Alexa skill, which anyone can interact with using voice commands.
Here’s what you’ll learn:
The main components of an Alexa skill
How to set up a skill and create content for that skill
How to build, test, and deploy your skill using Amazon’s developer console
To build this Alexa skill, you'll need a basic knowledge of lists and dictionaries in Python. You’ll also need to know a little about JSON. The truth is, if you can read and understand Python’s dictionaries, you’ll also be able to make sense of data written in JSON, which is all you need to build your first skill.
Before we begin building our skill, here’s what you need to know about Alexa.
Two basic components make up an Alexa skill: the skill interface and the skill service. The skill interface (the front end) detects a user's speech input and maps it into an intent. The skill service handles the backend functionalities of your skill. It receives the user speech input, detects the kind of request the user makes, performs the logic of the input, and then returns a response in JSON object.
Getting started
To start, we’ll need to create a free Amazon Alexa developer account. On the homepage, click on "Start a Skill." Then click on the "Get Started" button. It will take you to the Amazon developer sign-in page. Click on “Create your Amazon Developer Account” and then fill out the form with all the required details. Once done, click "Submit."
It will take you to this page:
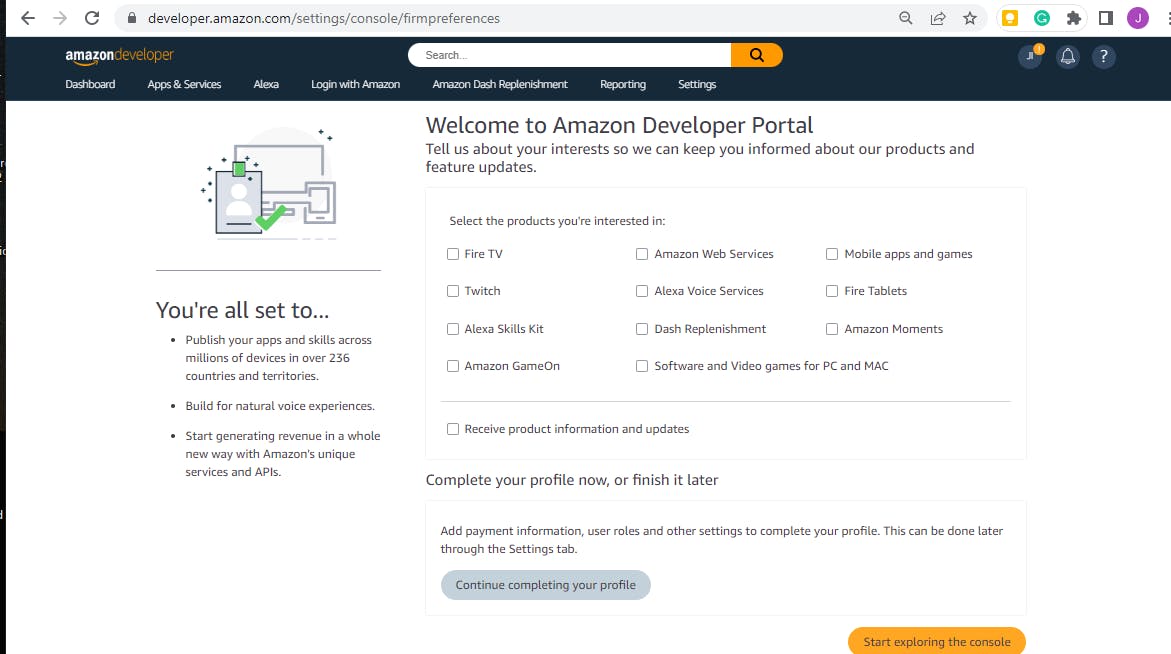
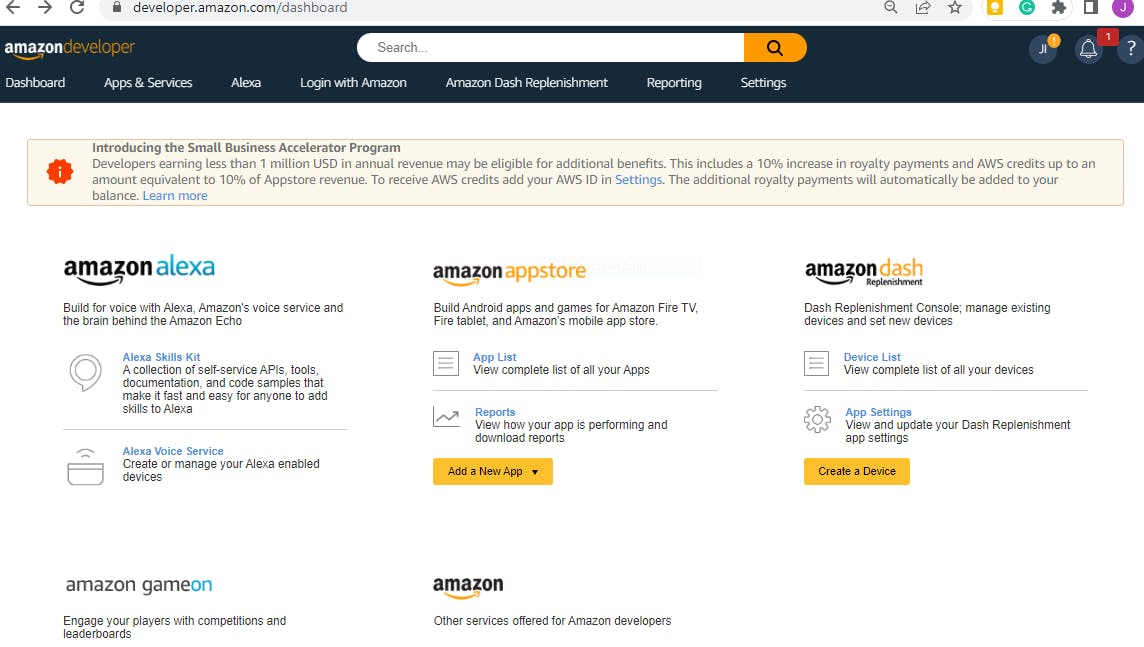
Scroll to the bottom and click the “Start exploring the console” button, which will take you to the developer console. Once there, click on the “Alexa” drop-down menu, and then click “Alexa Skill Kit,” as the image below shows:
Setting up your development environment
Now, If you followed the steps outlined above, you should arrive at this page:
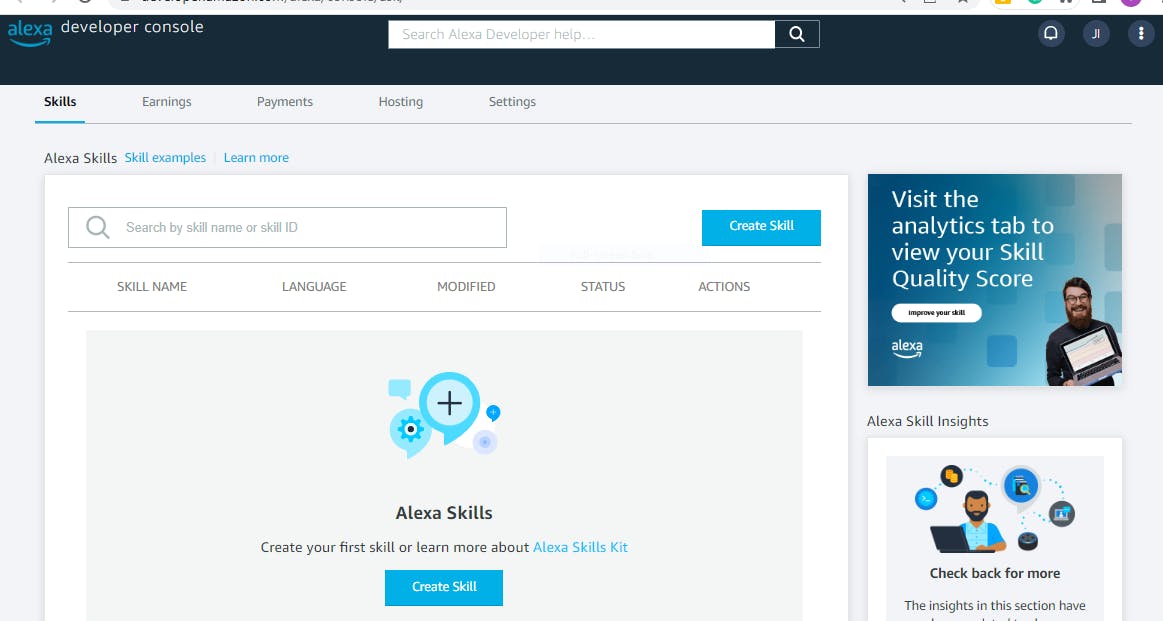
To start building your skill, click on the “Create Skill” button and enter a skill name. For this tutorial, we’ll be creating an Alexa skill that tells users fun trivial facts, so enter "Trivia Bot" as the skill name.
The skill name will also serve as your bot’s invocation phrase. Meaning, it’s the phrase a user will speak to activate your skill. Note that you can use different names for your skill and invocation phrase. The skill name and invocation phrase (which we’ll set later) are not the same. But for simplicity, our skill name will be the same as its invocation phrase. You can also select a default language from about eight major languages that Amazon Alexa supports. We’ll use English for this tutorial.
Clicking “Next” takes you to another slide, where you’ll set up an interaction model for your skill. Alexa supports two interaction models: the pre-built voice interaction model, which contains a set of ready-made voice utterances put there by Amazon developers; and the custom voice interaction model, where you design from scratch the phrases and utterances users would say to interact with your skill.
Because we’re building a new skill from scratch, click on “other”. Scroll down to Section 2 (labeled “Choose a model”) and click “Custom.” Scroll further down Section 2, and under “Hosting services," choose the template labeled “Alexa-hosted (Python)."
Once you’ve filled out this slide, click on “Next” to proceed to the next slide, labeled “Template.” Click “Start from Scratch,” then click "Next" again, which will take you to the review slide, where you can see all the settings you have made. Then click “Create Skill” and solve the CAPTCHA.
If everything is done correctly, you’ll be directed to the Alexa developer console:
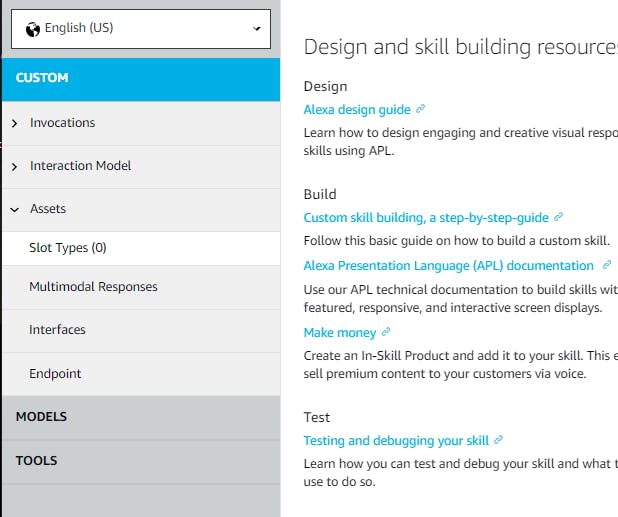
This page contains all the resources you need to design, build, test, and deploy your skill.
Building the frontend
Before we move on, a brief note on some components we’ll be using here, in the “Build” section of the console.
Invocation. This is where you set the phrase users will say to start your app. The same as when you say, “OK, Google” to start Google Assistant.
Intents. These represent actions that fulfill a user’s request.
Slots. Intents can have slots, which are optional arguments that give Alexa extra information about your request. For example, “Places to visit” is the intent. To provide more context, you could say, “Fun places to visit in [city name].”
Funandcity nameare the slots here giving extra information to Alexa.
To proceed, click on “Invocation name” on the right side of the page. In the box “Skill Invocation name,” enter “trivia bot” (in lowercase). Once you have done that, click on “Build model” to ensure that your changes are saved. You’ll do this every time you add a new skill or intent.
Next, proceed to the Intents panel by selecting "Intents" from the left sidebar:
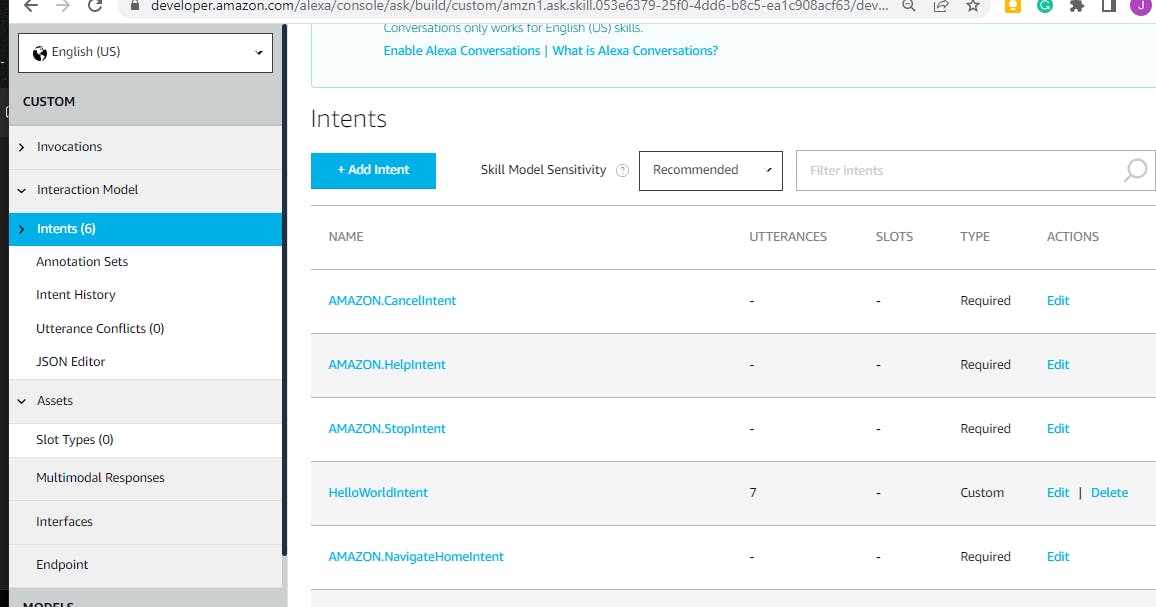
The intent section has six default intents built in by the Amazon team. But we’ll be creating our own. So click on “Add Intent” and set the name of your intent to “TriviaIntent.” Then click “Create custom intent.”

On the next page, you’ll add sample clauses to your intent. These clauses are the words users will utter to invoke your TriviaIntent. For our Trivia skill, we’ll use two intents: “tell me a trivia” and “i want to hear a trivia.” When you type in the first utterance, click the plus sign and add the second:
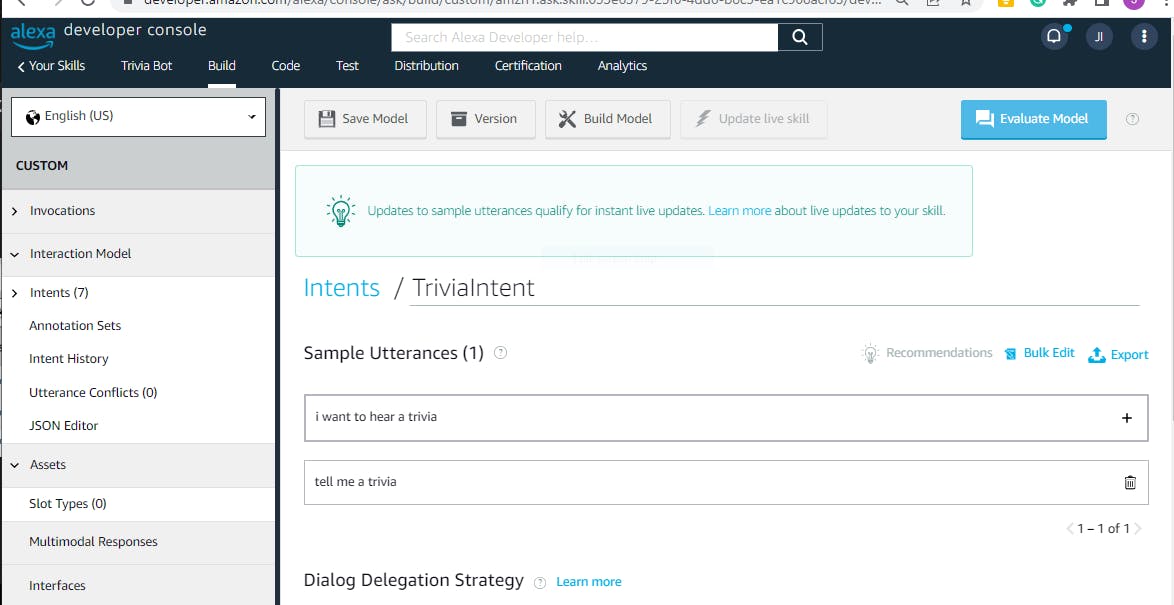
Once done, click on “Save model” and then “Build model” to ensure that your design is built into the model. The build takes a few seconds to complete; when complete, you get a pop-up notification at the bottom of the page informing you that your model has been built successfully.
Then you can click on "Evaluate model" to test your design. This is very important. Use the "Evaluate" button to check whether the sample utterances we have created actually trigger the right intent, which in our case is the TriviaIntent. When you click "Evaluate", a small window pops up. Enter one of the sample utterances we created and click “submit.”
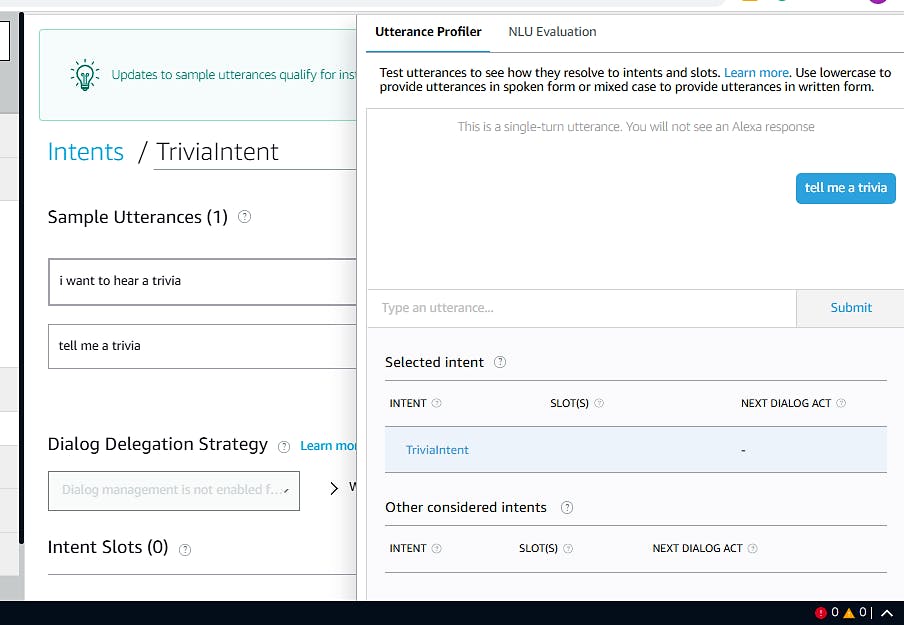
The image above is what is returned when you enter a sample utterance for an intent. Notice “TriviaIntent” written under Selected Intent. This shows that the utterance “tell me a trivia” triggers the right intent. Click on the "Evaluate" button again to get rid of the window.
Coding the backend of our Alexa skill
Now that we’ve confirmed that our sample utterance resolves correctly with our intent, we can start coding the functionalities of our trivia bot in the backend. To get started, click on the “Code” section at the top of the console. This will take you to an online code editor with three files:
lambda_function.py—our main project filerequirements.txt—a file containing information about all the packages being used in this skill developmentutils.py— a collection of Python functions and classes the lambda function needs to connect with AWS
We’ll do all our work on the lambda_function.py file. You don’t need to worry about others.
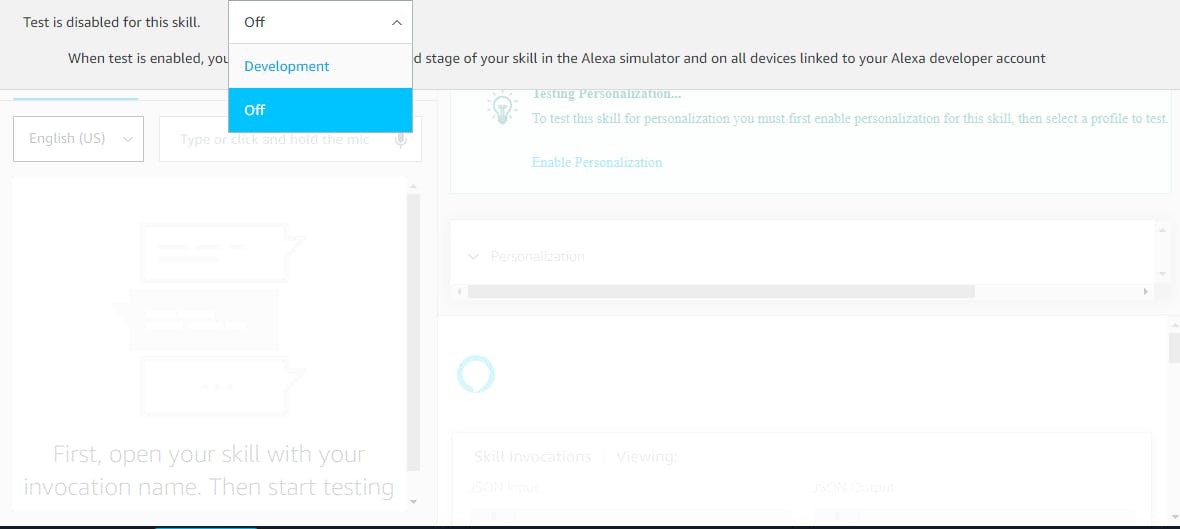
As in software development generally, testing is an essential aspect of your Alexa skill development process. Every time you add a new feature, you must test it before you deploy it. By default, the test feature in your developer console is turned off. To turn it on, click on “Test” at the top of the console. From the drop-down menu, click "Development:
You can now run your test by simply clicking on "Test."
Now, let’s code up some alexa_skill functions!
Creating the Trivia handler
We’ll now write a function that will take care of requests received from our TriviaIntent, which we designed and tested in the frontend. This function will inherit from the AbstarctRequestHandler class.
Inheritance is an object-oriented-programming principle in which a new (child) class is created from an existing (parent) class. The child class inherits the attributes of its parent class. The syntax for creating a class out of an existing one is class SomeChildClass(SomeParentClass)
To create an intent handler, open lambda_function.py and enter the following code above the LaunchRequestHandler() class:
class TriviaIntentHandler(AbstractRequestHandler):
    '''Handler for our Trivia Intent'''
    def can_handle(self, handler_input):
        return ask_utils.is_intent_name("TriviaIntent")(handler_input)

    def handle(self, handler_input):
        # returns the right Response
        speak_output = "Sure, here's a sample trivia for you"

        return (
            handler_input.response_builder
                .speak(speak_output)
                .ask(speak_output)
                .response

        )
Here's how it looks on the online code editor:
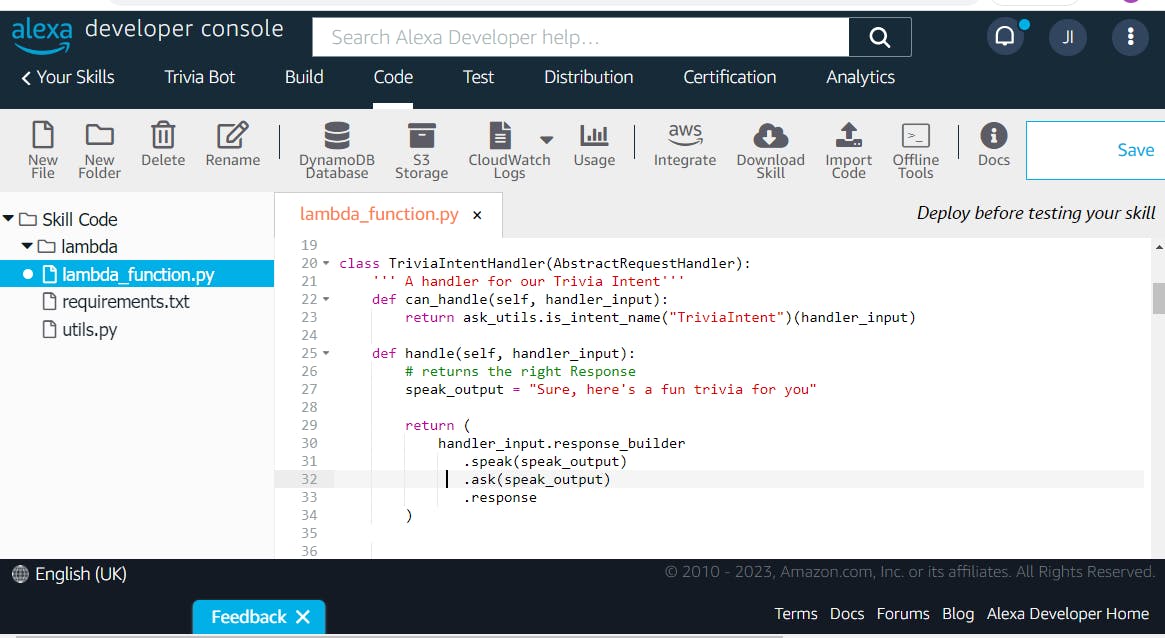
Let's examine what's going on in our code:
Under the new TriviaIntent class we created, we define two methods, can_handle() and handle(), each with two parameters, self and handler_input. The method can_handle() checks whether it can manage the request it received from the frontend of our Alexa skill. If can_handle() is True, the second method, handle() , is executed, which returns the appropriate response to the frontend. The variable speak_output is the words Alexa would say when responding to your prompts.
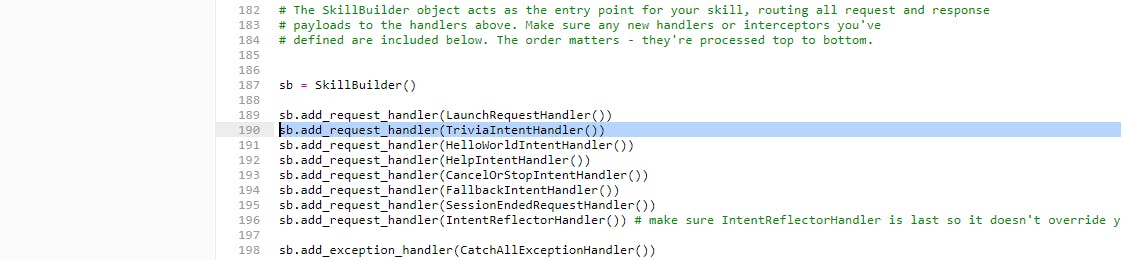
Next, pass the new intent handler you created as an argument to to SkillBuilder(). Scroll to the very end of the lambda_function.py file and add this line of code:
sb.add_request_handler(TriviaIntentHandler())
Order here matters, so make sure you add your new custom intent above IntentReflectorHandler so that it doesn't override it:
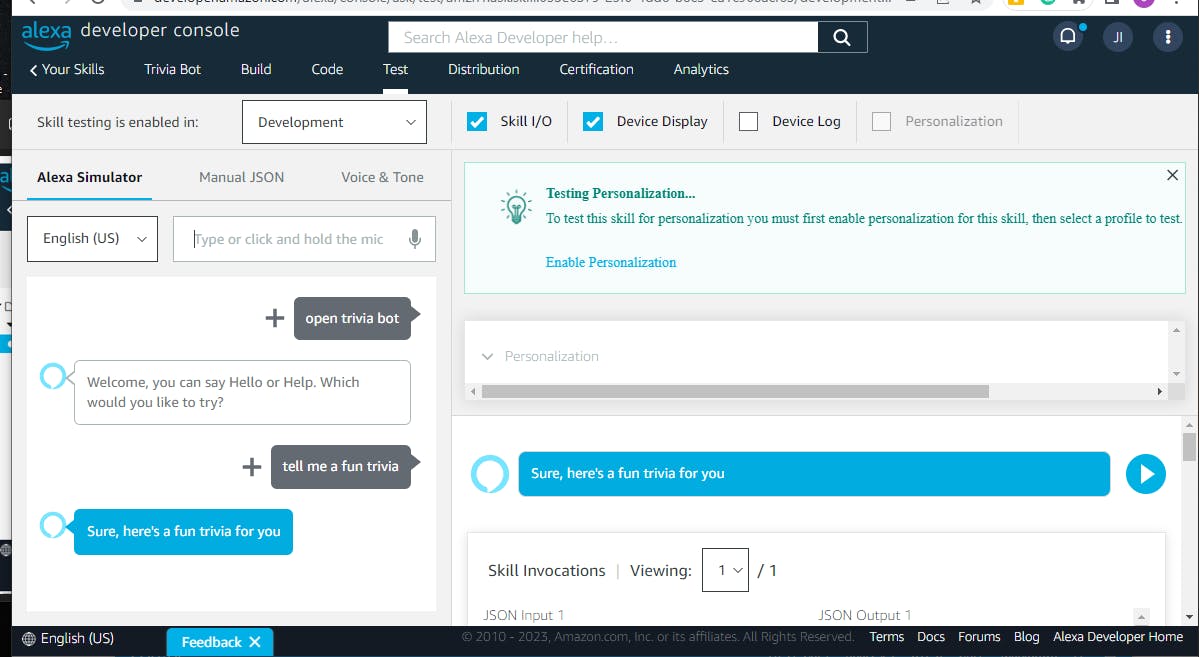
The first stage of our backend build is done. Time to test the code! Click on "Deploy" to save and implement your changes. Once done, navigate back to Test. Clicking "Test" opens up an Alexa simulator, in the Development window that pops up. Enter your invocation phrase to invoke Alexa, and then input one of your utterance phrases to execute your intent.
If you've done everything correctly, the response you get should look like this:
The next step is to add a trivia variable, which is a list containing some fun trivia facts that will be returned to the frontend when this particular intent is invoked.
Navigate back to Code, open lambda_function.py and add the following code:
trivia = [
         "Elephants can commuincate with each other using infrasound, which is sound below the range of human hearing.",
         "The tallest waterfall in the world is Angel Falls in Venezuela. It's so tall that the water turns to mist before it reaches the bottom",
         "A group of flamingos is called a flamboyance.",
         "The original name for the search engine 'Google' was 'BackRub",
         "The Great Pyramid of Cholula in Mexico is the world's largest. It's four times the size of the Great Pyramid of Giza.",
         "It's possible to lead a cow upstairs but not downstairs. A cow's knees can't bend in a way that would allow it to descend stairs.",
         "The space between your eyebrows is called a glabella",
         "A group of giraffs is called a tower",

         ]
Here's what it looks like in the online editor:
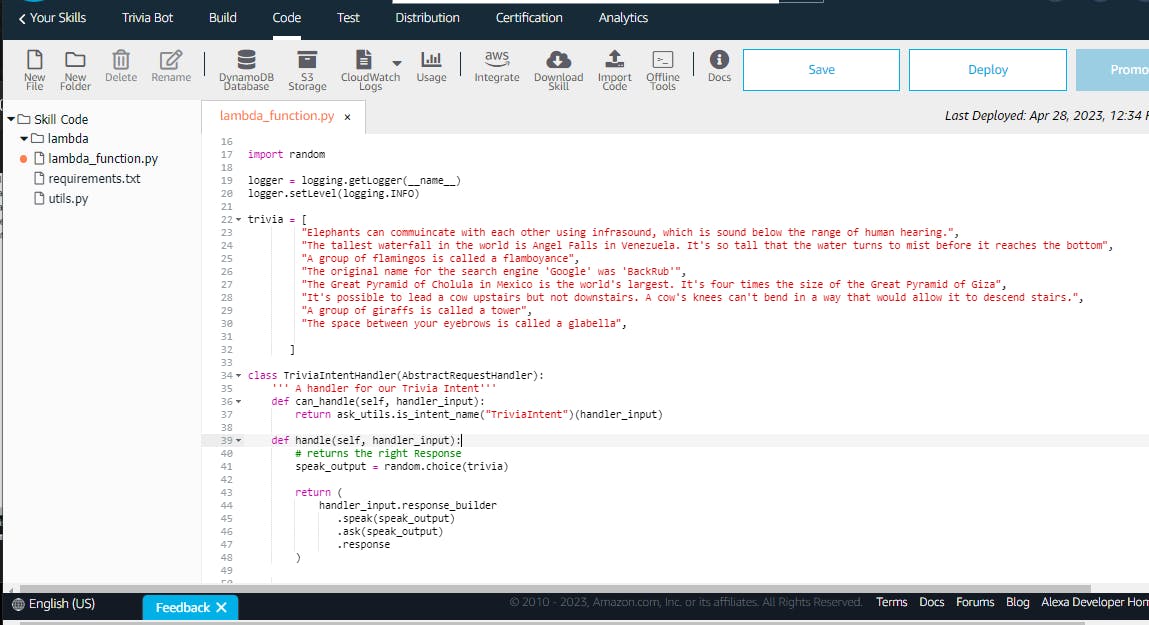
We've added a list of trivia facts. Next is to add the code that randomly selects and returns one fact from our list of fun trivia facts to the user.
to do this, import the random module by adding the import statement somewhere at the top of lambda_function.py. Then modify the .handle() function with the following code:
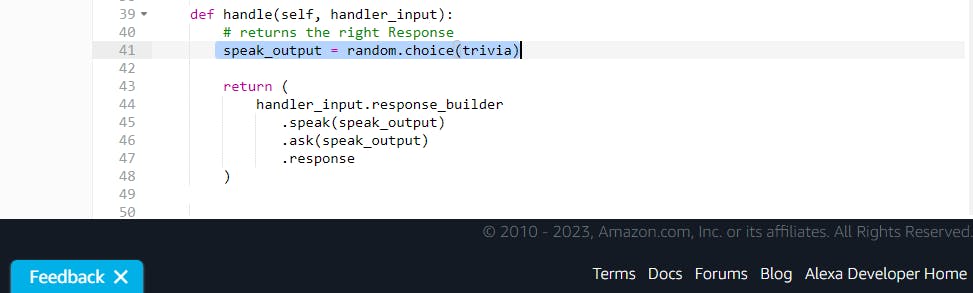
Your code should now look like this:

We're almost done. One final functionality to add to your bot is what Alexa would say to acknowledge that your trivia skill has been activated. To do this, find the speak_output variable in class LaunchRequestHandler , under the handle() function, and add the following text: "Hello there! I'm a trivia bot. Ask me to tell you a fun trivia":

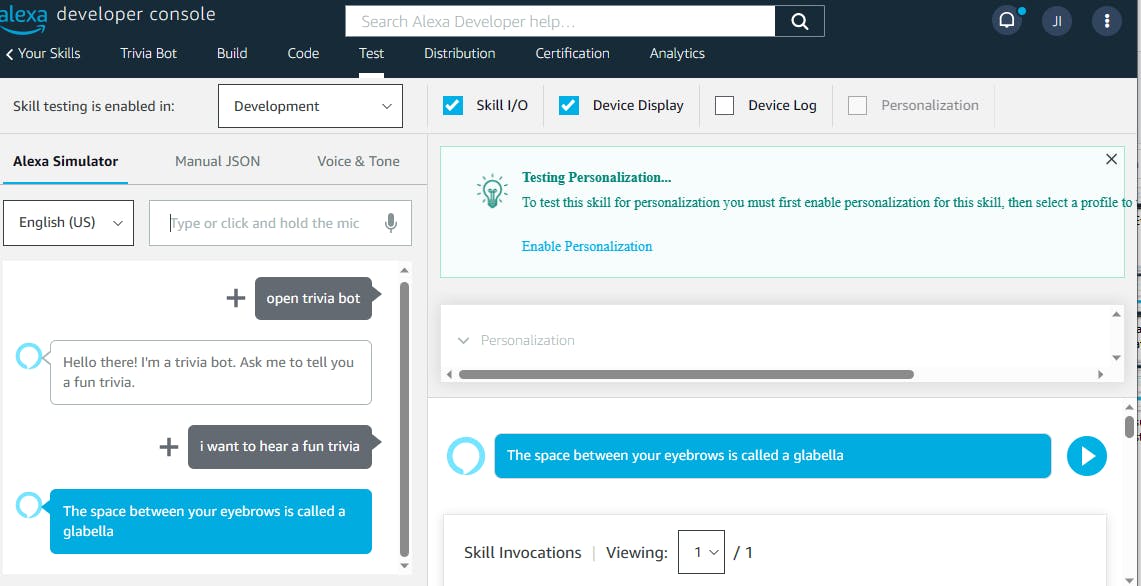
Once done, click on "Deploy" to save and deploy the new changes you've made, and then navigate back to "Test" for a final test of your Alexa skill bot.
If everything is done well, Alexa should greet you properly with the acknowledgment text you just set above. When you type in one of the sample utterances (e.g., "i want to hear a trivia"), it should respond with a random trivia fact, as shown in the image below:
You've just created your first skill bot with Python. Well done, Alexa skill developer! For a deeper dive into Amazon Alexa skill development, you can read the official documentation. Have a great idea for a skill? Go ahead and build it! You can create any number of new skills to handle everyday routines. You can even earn money with your skill. Take advantage of the opportunities in the growing market of artificial intelligence and voice-enabled solutions.